Monday, January 1, 2018

HAPPY NEW YEAR! BRADFORD FAMILY FARM COLLARDS & MOLASSES ROAD TRIP


BRADFORD FAMILY FARM HEIRLOOM COLLARDS & WATERMELON MOLASSES


It has been a long year, and one full of many changes for me. I've had a lot of life changes this year with the death of my husband, and a move from my house to a smaller place, but now I start a new year, and it's time to get back to what I love, and that is writing about food and people. This road trip story to the Bradford Family Farm in Sumter, South Carolina, is perfect start for my new blog format, because it involves great food and the wonderful people who grow it.

It all started last summer when a Facebook friend posted about the Bradford Heirloom Watermelon. On my Facebook page, I saw the owner of that farm, Nat Bradford, as he delivered those beautiful watermelons to excited Charleston chefs.  I didn't put my name on the list, because I didn't think it would be possible to get even one watermelon, because they seemed to be in great demand.

Then, last month, I saw the notice from the same FB friend that the grower of the heirloom watermelons was growing heirloom collards. Since I had grown up in the Alabama Black Belt and had eaten some of the best food in the land (according to me),  I wanted to try these new, "old collards". These "heirloom" collards were supposed to represent all that we had lost in flavor and tenderness through the years of mass farming, hence my personal introduction to Nat Bradford, and the Bradford Family Farm.


Nat Bradford, the great farmer behind the heirloom collards
now growing in South Carolina.

I wrote to Nat, and he was very gracious and told me that I was on the list. Finally!  Every few days, Nat Bradford would pop on FB and give us an update. He would say, "the collards should be ready by the end of next week". I waited as patiently as a woman who has been pregnant for 10 months.

The day finally came, and Saturday morning I got in my car, and drove over a hundred miles, to the Bradford Family Farm up above Sumter, South Carolina. I loved that Nat and I introduced ourselves and the next thing he did was to give me a hug, and he hugged everyone who came up to get collards, while I was there. I think that says a lot about someone. It means to me that he cares about people.  Yep, he is my kind of people. 
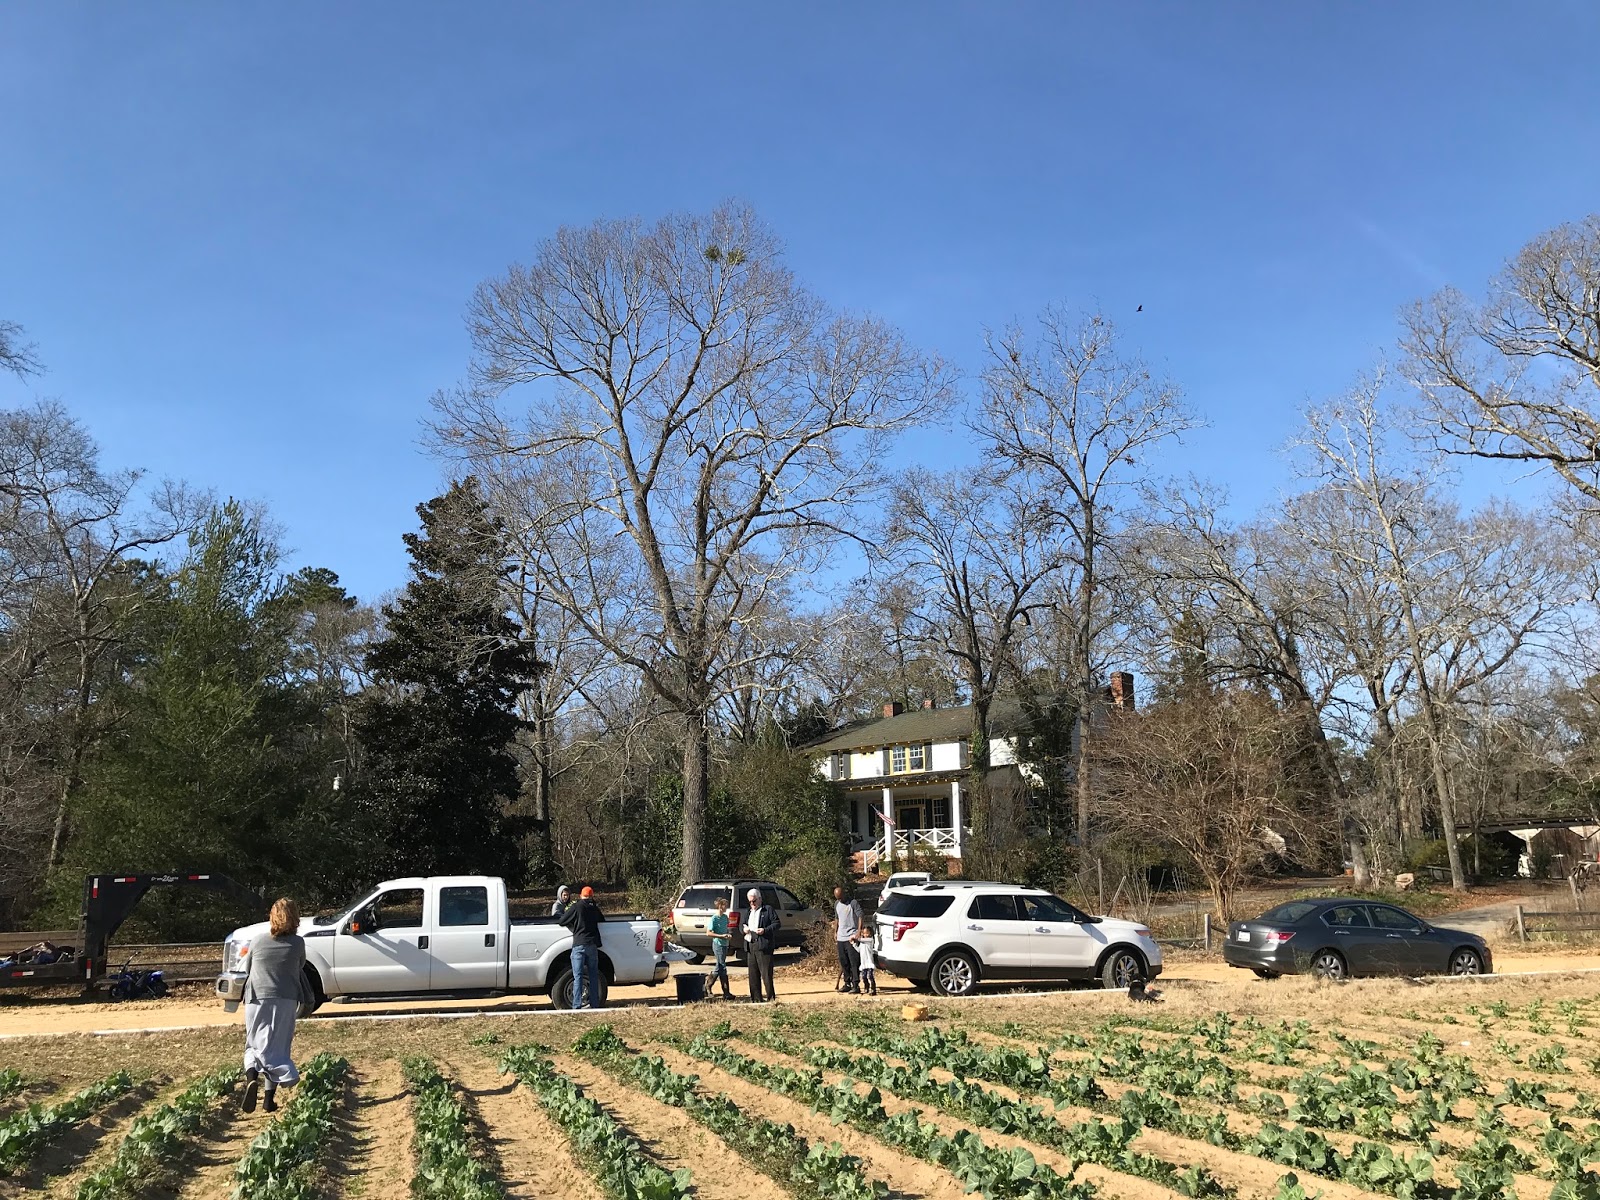

Bradford Family Farm

While there, Nat, gave a tour of the collard field, explaining to me and to two other chefs who were from Myrtle Beach, how he had grown the collards and what he looks for in this heirloom variety, while we occasionally chatted about how we cook our greens.

Nat gave each of the chefs a young, raw collard leaf to taste. It was amazing the distinct flavors that were present with just one bite. First the fresh collard taste, the peppery taste and in the taste of the stem there was an incredible amount of sweetness. It was a great experience.


It started to get very busy there, so after getting my collards and Bradford Family Watermelon Molasses, I said my goodbyes to everyone, and started my hundred odd miles back to the Charleston area to get ready for the holiday. But, before I got home, I shared one bag of the collards. We always need to share.

Now for the preparation. You have to remember that these are not the big leaf collards that we are getting from the grocery store. The collards at Bradford Family Farm are tender, crisp, young collards that could be eaten raw if you chose to. The collards are also just out of the field, so you can't get any fresher than just picked greens.

The preparation of the collards is very simple. Just cut, wash and cook for as short or as long as you like and finish any way that you like. The collards are so tender and fresh that you won't need to do much for flavor, it's there already. 

I had two pounds of collards and I prepped the collards for each cooking preparation the same. It was in the actual cooking that each pound was different. To begin preparation, I cut off the stems just above the root area, and chopped the remaining stems, which are very tender. I rolled and cut the larger leaves. This is called a chiffonade. "made of rags". in French. This is how our cook in Alabama would cut them for cooking when I was a child.
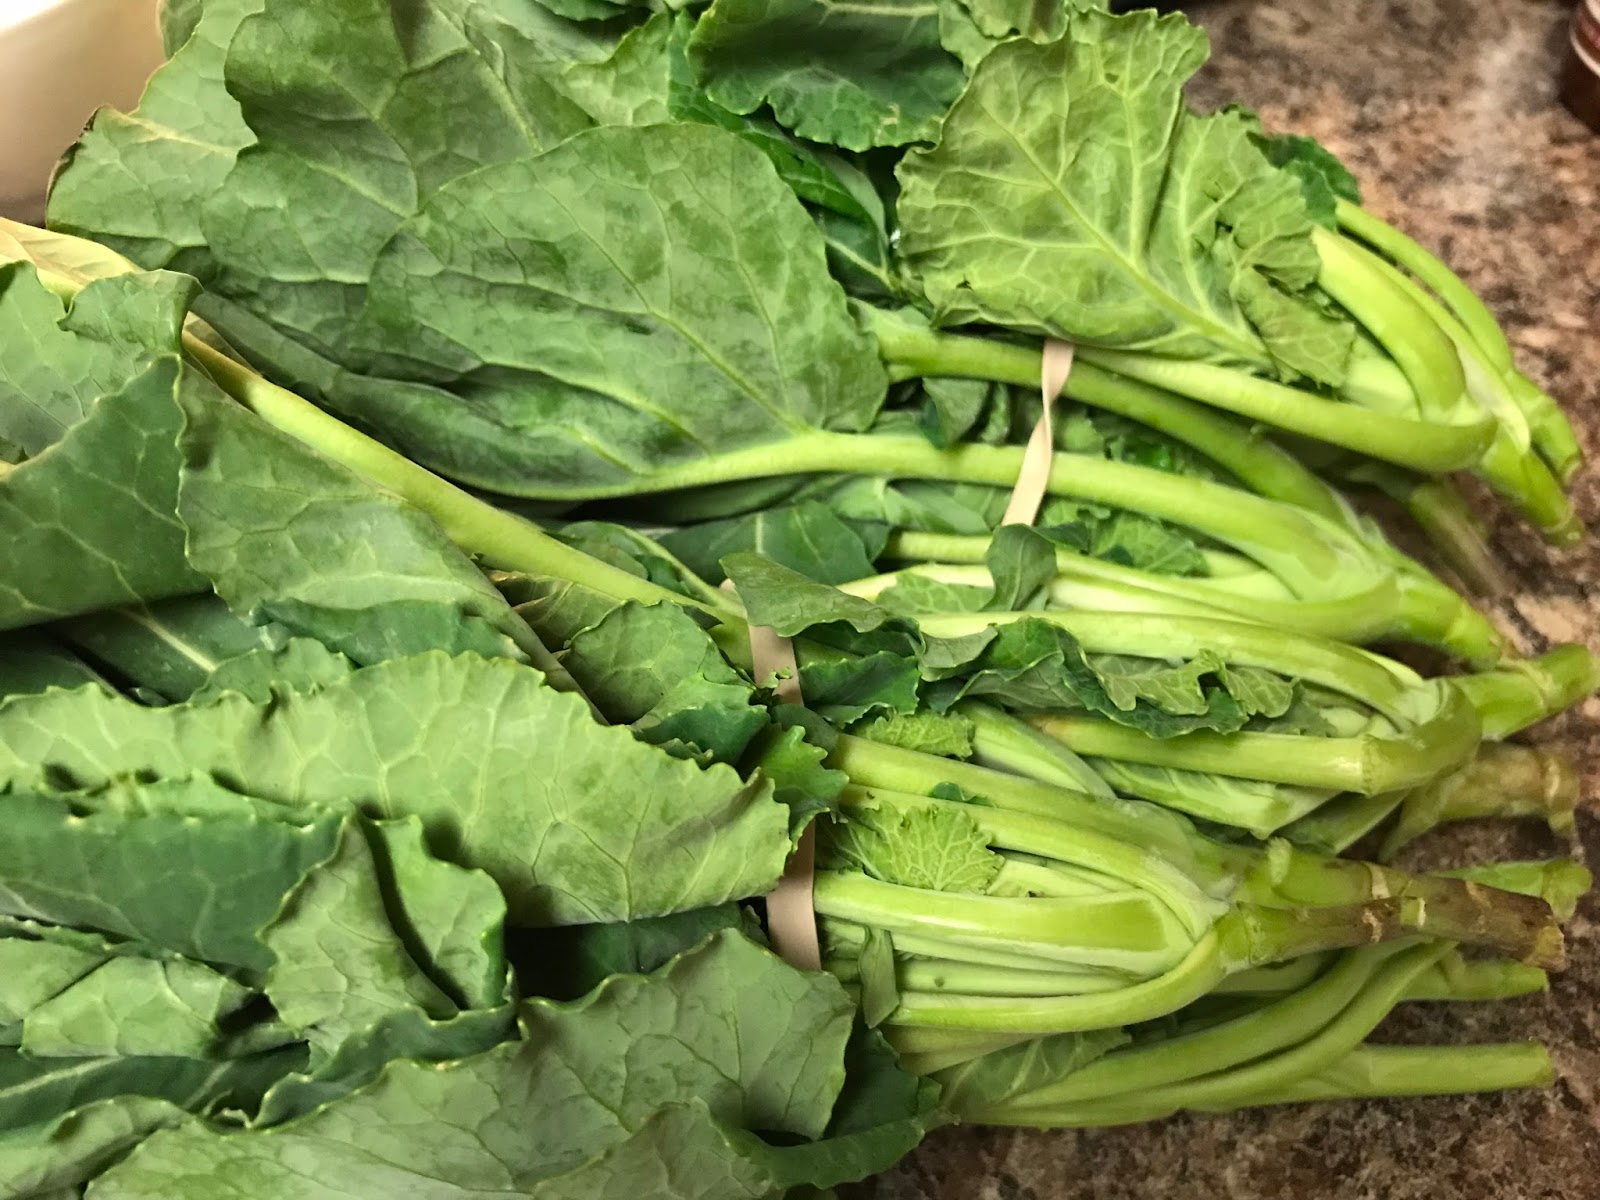

Roll leaves and cut across to chiffonade

"Rags"


Applewood smoked, uncured bacon, for the first cooking


Greens including the tender stems go into the skillet


A triple cover for the iron skillet

After the collards, including the tender stems are cut, wash the greens 3 times, changing the water each time. On the last wash, lift the collards gently out of the water and place them in a bowl.

When you have finished your collard preparation, cut 6 slices of applewood smoked, uncured bacon,  into pieces and add it along with 1/2 tablespoon olive oil, to a large iron skillet. Cook the bacon until  brown and crisp, remove the bacon from the fat, to a small bowl and set aside. Have your greens ready at this point. Keep the bacon fat and oil at medium high (6 on the electric range dial) in the skillet.

Add the wet collards to the fat in the skillet over medium high heat (6). Be careful, because when the collards hit the fat, so to speak, they will hiss, sputter, spit and splatter at you. But, this is a good thing. This is what we call frying collards in Alabama cooking, and after the frying, this water on the collards will be used to steam them.

Stir the collards a few times to coat them with the fat, and place a piece of parchment, and foil over the collards and then a tight top. Turn the burner down to 4 or medium low. Uncover every few minutes to stir. It won't take but about 15 minutes for the collards to be cooked and ready. Use your own judgement on how tender you want them to be. Salt carefully. Remember that you have a bunch of collards that will shrink down a lot, so don't salt until the shrinking starts.  If the collards become too dry before they are done to suit you, add a small amount of water or chicken broth to finish cooking.  When the first pound is ready, but before removing from the heat, stir in one teaspoon of brown sugar, one teaspoon or to taste, red pepper jelly, and one a dash of red pepper flakes. When ready to serve, add the bacon.

The best one-
The second pound was cooked in the same method as the first but without the bacon. Just add about 3 tablespoons of olive oil. I used a California Olive Oil with a butter flavor. Use a medium high heat (6 on an electric range). When the oil is very hot, add the collards and after a few stirs, turn heat down to 4 or medium low. Add a small amount of water if needed to keep them from getting dry. Salt to taste.

This was the best one of all. Nat Bradford told me that after I'd cooked the collards, to drizzle a little Watermelon Molasses across the top of them before serving, So, I put the cooked collards in a bowl, and  I not only drizzled the molasses across the top of the collards,  but drizzled a little apple cider vinegar to balance it out. Toss slightly before spooning onto a plate. "Oh, my gracious alive", is what my late mother would have said.


Happy  New Year!


For information on the Bradford Family Farm, and to order any of their delicious products, go to BradfordWatermelons.com.


Friday, December 22, 2017

Leek & Laughing Cow Soup


I was served this soup at a Christmas party that I attended in Columbia. It was so delicious that  I asked for the recipe. I cooked the soup tonight and the only problem is that I can't stop eating it! The recipe is so simple and takes such a short time to make. Who would guess that it's made with Laughing Cow Cheese.  Here goes.

Leek and Laughing Cow Soup

1 lb ground beef
2 leeks, white part only, cut into rings (washed well)
8 ounces sliced mushrooms (optional)
4 (21g) packages of Laughing Cow Garlic Cheese with Herbs*See note below
1 (171g) package Laughing Cow Original Swiss*
3 cups chicken broth
1 cup heavy cream
Nutmeg

Brown the beef over medium heat in a heavy Dutch oven. Add the washed and drained leek rings, and mushrooms. Cook for about 5 minutes, or until leeks and mushrooms are done. Add the packages of cheese and mix in until incorporated. Add the chicken broth and bring to a boil. Lower heat and simmer for about 5 minutes. Add heavy cream, and bring back to simmer and cook until heated through. Add salt and pepper to taste. Sprinkle each bowl or cup of soup with grated nutmeg.
*There are 8 (171g total) packages of individually wrapped cheese in each package of Laughing Cow cheese. You will use one entire package of the Laughing Cow Swiss Original (8 packages) and half  (4 (packages) of the package of Laughing Cow Garlic Herb. You can use more if you really like the flavor of garlic. For me, 4 packages of garlic herb was enough.

Enjoy.


Wednesday, July 26, 2017

NO WORK, CHILI SOUP WITH TORTILLA CHIPS & SOUR CREAM!


My Mistake-Summer Chili Soup

First, let me say that I am a soup lover. It doesn't matter if it's 100 degrees out there. I have talked to several other people lately who've told me the same thing. Maybe it's a yearning for plain old comfort food. Whatever it is, I've had some kind of soup almost every night this week.

I needed a new soup recipe, and this one needed to have a short list of ingredients with ease of preparation. I found one similar to the one below. No chopping onions, or peppers or garlic, so joy! I wrote down the list of ingredients on a scrap of paper, and headed for the store.

With list in my hand, I started with the main ingredient, the beef. I knew that I was going to use ground sirloin because it has less fat, and that was the easy part, but the other ingredients were impossible to find. No joy! That's when this recipe was modified as I walked down the aisle telling myself that I could substitute this instead of that, and you know how the rest of the story goes. I know you've done it too.

I came home with my groceries, got out a Dutch oven and started cooking. This is what I came up with, and it was really good. You might want to add more or less seasoning. Depends on you. I have enjoyed it two nights in a row.

1 lb. ground sirloin 

1 (12.7 oz.) package Birdseye Southwest Style Protein Blend 

1 (14.5 oz.) can petite tomatoes, Zesty Chili Style 1 (8 oz.) can tomato sauce 

1 (14.5 oz.) can beef broth or 14.5 oz. water and 1 level tablespoon of Better than Bouillon in Beef or Roasted Chicken 

1 tsp. McCormick Taco Seasoning Mix 

1 tsp. chili powder 

½ teaspoon sugar 

Salt and pepper to taste Sour cream and tortilla chips In a large Dutch Oven, brown the ground beef. Add the remaining ingredients except sour cream and chips. Simmer for about 15 to 20 minutes. Serve with sour cream and chips.

Saturday, April 1, 2017

Country Dinner with Macaroni & Cheese, & Strawberry Galette, Oh Lordy!

MACARONI & CHEESE

On Friday afternoon, I decided to make a real country dinner. So, I had fried chicken, macaroni and cheese, tiny green beans with butter, sliced tomatoes and cornbread. The mac and cheese was the best I've made in a long time, and the connoisseur of mac and cheese, McK, gave her approval by having a plate full of the golden goodness.
 
After dinner, we enjoyed Strawberry Galette with vanilla ice cream. What a treat for a Friday night dinner.
 
So here you go, for those who want to try the mac and cheese. The Strawberry Galette recipe is below. It was really good if I do say so myself.

 
 Macaroni & Cheese
 
First, a little tip about macaroni. If it's not salted enough in the cooking process, your mac and cheese will be as bland as your macaroni. After all, it is the main ingredient. So, near the end of the cooking process, check the taste by taking out a spoon of macaroni and tasting it! If it's not salty enough, add more salt and continue cooking. You might also do the same when you assemble the casserole, before you add the eggs, to make sure you have enough seasoning.
 
 
1 (16 ounce) box macaroni, cooked in boiling salted water and drained

1 (8-ounce) block of seriously sharp Cheddar cheese, grated
1 (8-ounce) block of Vermont extra sharp Cheddar, grated and divided
4 eggs, beaten
2 cups heavy cream
Salt and pepper to taste
 
Preheat the oven to 350 degrees. Spray an oven proof baking dish with non-stick cooking spray.
In a bowl large enough to hold all the ingredients, add the macaroni, heavy cream, the seriously sharp Cheddar and half of the grated Vermont Cheddar. Add salt and pepper as needed. To this mixture, add the beaten eggs and mix well.
Place the mixture into the baking dish and top with the remaining Cheddar cheese. Spray the underside of a piece of aluminum foil, and place it over the baking dish. Baking time will depend on the size of the baking dish you use, but if it's a 13 x 9-inch dish, it will be about 40 minutes, or until it's bubbly around the edges and at least 170 degrees in the center.


 Strawberry Galette
 
Made from those fresh strawberries that I picked in the strawberry patch last month.
 
1 pie crust, ready made or home made, large enough for a 10-inch pie plate
4 cups cut roughly cut strawberries
2/3 cup sugar
1/2 tablespoon cornstarch
2 tablespoon strawberry jam
 
Preheat the oven to 350 degrees. Spray the pie plate with non-stick cooking spray. Lay the pie crust in the plate. Mix the cut strawberries with the sugar and cornstarch, and place them in the crust. Pull the crust up around the strawberries. Bake until the berries are very tender and the crust in light brown. It will take about 35-45 minutes on convection. When done, warm the strawberry jam, and spread it on top of the berries. Serve warm or wait until room temperature and slice the Galette. 


Monday, March 13, 2017

MOTHER'S FRENCH DIP SANDWICHES, SUNDAY NIGHT SUPPER


This is made from a recipe that my cousin Sandra sent from mother's recipe file. I've made it again and again, and it is truly loved.
 
I serve this with a side of coleslaw and horseradish. My mother recommended serving it with roasted potatoes and salad.
 
 
French Dip Sandwich with Au Jus
4 pound rump roast
1 (10.5 ounce) can beef broth
1 (10.5 ounce) can condensed French onion soup
1 (12 ounce) can or bottle of beer (optional-I do not use the beer, but you can if you like)
1 large onion cut into thick slices
6 French rolls
2 tablespoons butter 
Trim excess fat from the roast, and place in a slow cooker*. Add the beef broth, onion soup, onions and beer. Cook on low setting for 7 hours. Preheat the oven to 350°. Split French rolls, and spread with butter. Bake for 10 minutes, or until heated through. Slice the meat on the diagonal, and place on the rolls. Strain the dipping sauce, and serve. Excellent with  salad and oven roasted potatoes.
*If you want to serve it sooner than later, just pre-heat the oven to 350. Add the roast to a large Dutch oven, add beef broth, onion soup and onions, and cook for about 21/2 hours, turning often, until the meat is tender.


Saturday, February 4, 2017

SATURDAY NIGHT, BEEF & CABBAGE SOUP & CORNBREAD, JUST PLAIN GOOD!


Beef & Cabbage Soup, Oh Lawdy!
 
I was yearning for some good old hearty beef and cabbage soup today. So, I thought of one that my mother made, but I used a simpler method. It was good, and it was easy. No mess, no fuss, a few good ingredients and that was all I needed to make this delicious soup and a pan of cornbread. Pure country, pure Alabama. Believe me when I say that I enjoyed every bite.
 
My mother told me that my great-granny, Laura Ann Davis Reid Johnson, used to make this soup, but she used canned corned beef. When you think about it, in the early 1900's, that would have been fast food. There were few homes with electricity in the rural area that I came from, and no freezers, so there wouldn't have been that pound of ground beef in the freezer to thaw and use. The cabbage wouldn't have been from the store but from the winter garden. There may have been onions but maybe not, so people back in the country at that time used what they had.
 
It was pretty easy for me this morning as I drove over to Publix and bought a pound of ground sirloin, a head of cabbage, some beef broth, and some red beans. Yep, well, I thought I was buying kidney beans. I seem to do that a lot lately, but the red beans worked out just fine, and were actually a little softer and more flavorful. The rest of the ingredients, I had here already. So, let me recap and hope I don't forget anything, because this was not a real recipe written down, it just so happens that I remember what went into the soup pot.
 
By the way, this soup freezes really well. I took out 4 cups to serve for supper and put the rest into freezer bags and those will go in the freezer for later day suppers. You can do the same with your cornbread if you have any left over, just place in individual bags, and store in the freezer.
 
This was the perfect supper to end with a piece of apple pie, and whipped cream or ice cream.
 
Beef Cabbage Soup
 
1 pound ground sirloin
1 small head of cabbage- you will need 8 cups of one-inch cubes
6 cups beef stock
1 (14.5 ounce) can petite diced tomatoes
1 (15.5 ounce) can red beans, or red kidney beans
1 cup chopped onion
1/3 cup green pepper
1/4 teaspoon dried thyme
1/2 teaspoon chili powder
2 cups cubed and cooked potatoes
 
In a large Dutch oven, brown the beef. Add the beef stock, cabbage, tomatoes, beans, onion, pepper, thyme, chili powder. Cook covered on a strong simmer for about 20 minutes, stirring every few minutes. When the cabbage has cooked, put the potatoes in the soup, check your seasoning for salt and pepper and adjust at this time, and cook another 5-10 minutes until the flavors have had a chance to mix. Serve with your favorite cornbread. Makes 13 cups of soup.


Crispy Cornbread
 
I love a crispy cornbread. All you have to do is put about 1/3 cup oil for an 8-inch skillet. Let the oil get really hot. Put half of the oil into your favorite cornbread batter, and then dust the remaining oil in the skillet with raw cornmeal or mix. Let it start to get slightly golden and then pour your batter on top of the meal. Bake as usual for your recipe. When the bread is done, flip the cornbread out upside down on a plate, as the photo above. The bottom becomes the top.
 
 
See how I put the meal in the hot oil, and it starts to bubble and brown, and now you want to pour your cornmeal batter on top of this and bake it as you usually do.


For more recipes, please see my other blog, https://southernsundaydinner.com


Thursday, January 26, 2017

MY TOMATO PIE


My son, Rob took this photograph of tomato pie on a Sunday afternoon at Page's Okra Grill, after the restaurant had closed. I didn't work for Page's, but I loved cooking with Tony Page and he would call me and tell me when he wanted to try a new recipe. We cooked my tomato pie recipe on this day, and made buttercream and Grillades and Grits. It was a great cooking day. My son had gone with the to photograph the food, and I love the way that he photographed the pies.


Savory Tomato Pie

I've been making this pie for many years now. It's been through a few changes from the original pie. For example, I use one layer of tomatoes. If you've got really good tomatoes and you put them in a pie, then you'll have a really good pie, but if you don't, then all you will taste are tomatoes that are not really good. One layer of tomatoes forgives that in this pie. My other son loves tomato pie and he was the inspiration for the recipe below.

Try it and see if you like it. I promise this pie will be good. The recipe below is reposted from my e-book, Seasoned in the Kitchen ($2.99), available at Amazon.com.

Savory Tomato Pie

1 pre-baked 9 inch pie crust*

1-1/2 to 2 ripe tomatoes, peeled

1 teaspoon dried basil or 3 tablespoons chopped fresh basil

1 small to medium sweet onion, finely chopped

1 ½ cups grated sharp Cheddar cheese

1 cup mayonnaise

Salt and pepper to taste


*Blind bake the pie crust according to package directions. Cool.

Peel the tomatoes by making an “x” on the smooth end of the tomatoes and dipping them into boiling water for 30 seconds. Remove from water, and the peel should come right off.

Slice tomatoes into ½ -3/4 inch slices and set aside on paper towels to drain.

Place the tomato slices in the pie shell in ONE layer (this is the secret).

Sprinkle with salt and pepper to taste.

In a medium bowl, mix the chopped onion, basil, cheese and mayonnaise. Spread this mixture evenly over the tomatoes to the edge of the pie crust.

Bake at 350ยบ for 35-40 minutes, or until cheese is bubbly in the center. Remove from the oven and wait 15 minutes before serving. 

*Note: Make small tomato pies using the same method as above. These are great for tea parties. You can also make tomato pies by putting pimiento cheese into phyllo shells, topping with a slice of Roma tomato and baking until the cheese has melted.